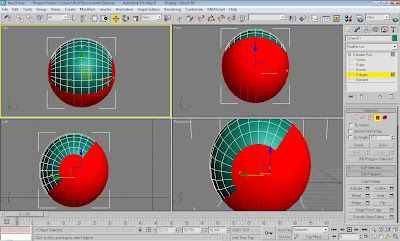
I started with a basic sphere shape and used it as a basic model of the head. After scaling the sphere to a more appropriate shape I rotated the sphere 90 degrees on the X axis. This is because I didn’t want the cluster of polygons being at the front and rear of the sphere and wanted them instead at the sides.
I selected the ‘paint selection region’ option from the tool bar along the top and began to draw over, in polygon sub selection mode, the polygons that I didn’t need for creating the head.
The polygons at the side where the ear would be, the bottom area where the neck would begin and the front where the face is, would all be deleted. On the front view I also deleted the right hand side of the sphere because everything on the left hand side will be mirrored.
Now I started to join the head area to the face area. First of all I needed to lower the amount of polygons on the head area. This is to make it easier when joining the head and face area together. On the side view I selected every other edge down the side of the head area then on the right hand side under the 'selection' panel I clicked 'ring'. Ring selects all the edges parallel to the edges already selected.
Under edit geometry I clicked 'collapse', this removes a lot of the polygons while still keeping the shape of the head. Doing this makes it much easier to continue modeling the head and neck area.
I joined the head and face area by using the snap vertex option and bring the vertex points at the seam of the face and head together and welding the points.
Once the head and neck area was welded together the next step was to choose 'attach' under edit geometry and make both the objects into one.
To continue to build the side and lower areas of the head I had to select the edges and shift drag to create new polygons from the selection. By doing this I could create lots of new polygons to sculpt into my neck area.
After a lot of creating, moving and tweaking lots of polygons and verticies I settled on the shape of the head and neck. This was another time consuming and detailed aspect of the modeling process because trying to keep the flow of the skin to keep it realistic was quite difficult.


No comments:
Post a Comment